Often when you think IOT, it’s the security (or often the complete lack of) which makes it scary. This post, however, focuses on using some IOT tech for a different scary reason – Halloween.
I threw a bit of a last-minute Halloween party this year and, in typical fashion, decided that I should leverage the unhealthy amount of tech I have in my house to go that little bit further when it comes to decorating. In this post I’ll going to go over the cooler parts of the halloween decorations that made this year’s party that little bit spookier.
Overview
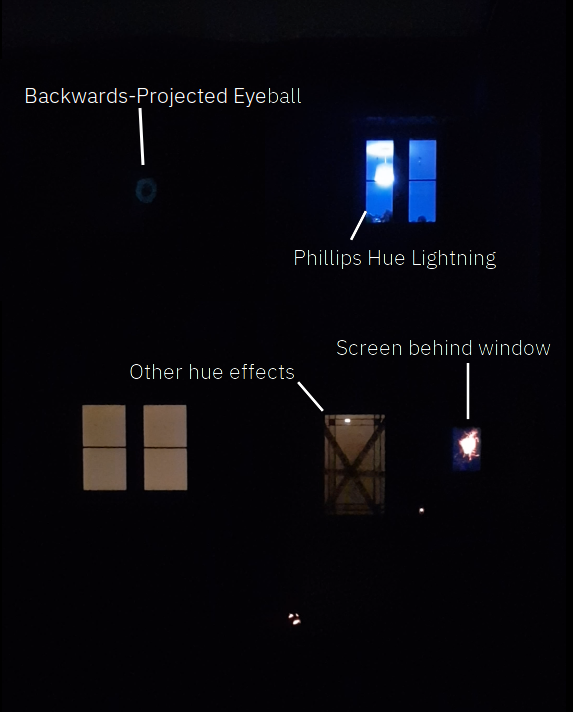
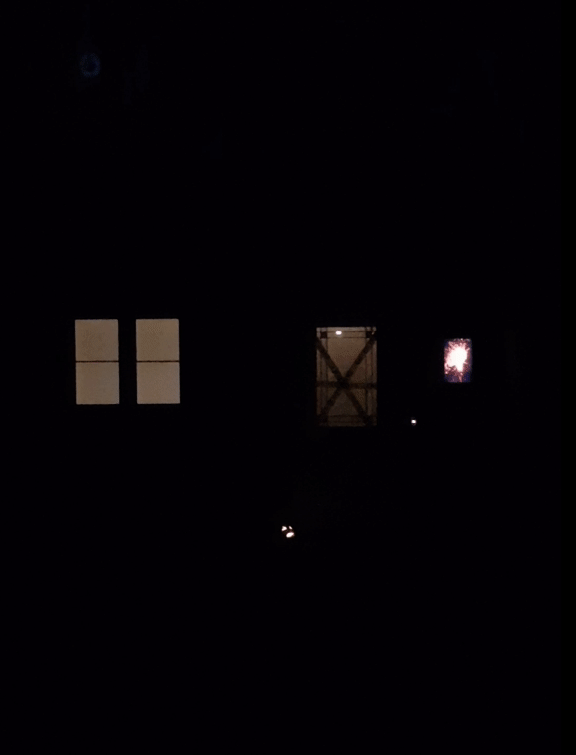
I wanted the outside of the house to look good, normal decorations are fine (see the ‘do not enter’ tape across the door and the… expertly carved pumpkin), but by the time the trick-or-treaters are out the suns’s gone down and there isn’t much to see, so I came up with a few things to fix that.
1. Display behind the window
This one was easy – My downstairs bathroom windows is just to the right of the front door and as you would hope, it’s frosted. This made it a great candidate for putting a screen behind and displaying ghoulish images.
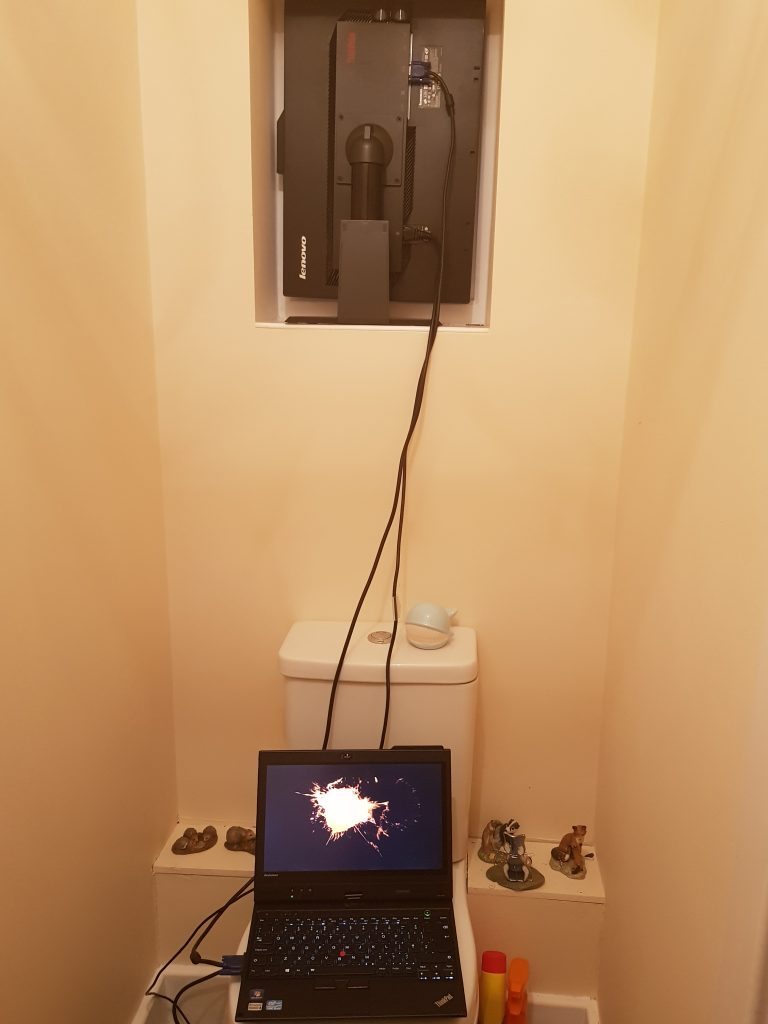
For the actual graphics I simply searched for what I wanted plus ‘stock footage’ on youtube, and found videos with a black background. Once I’d found what I wanted (Which here was a splash of blood) I changed the youtube.com part of the URL to youtuberepeat.com, which is a youtube mirror site that will loop your video indefinitely.
2. Backwards projection eyeball
A long time ago I bought one of those cheap projectors on Amazon. For your £60 you get a project that’ll put out about 240 – 360p at a pretty unimpressive brightness. Whilst I’ve never watched a film one it, it’s useful for projecting images and large text, so here it worked great.
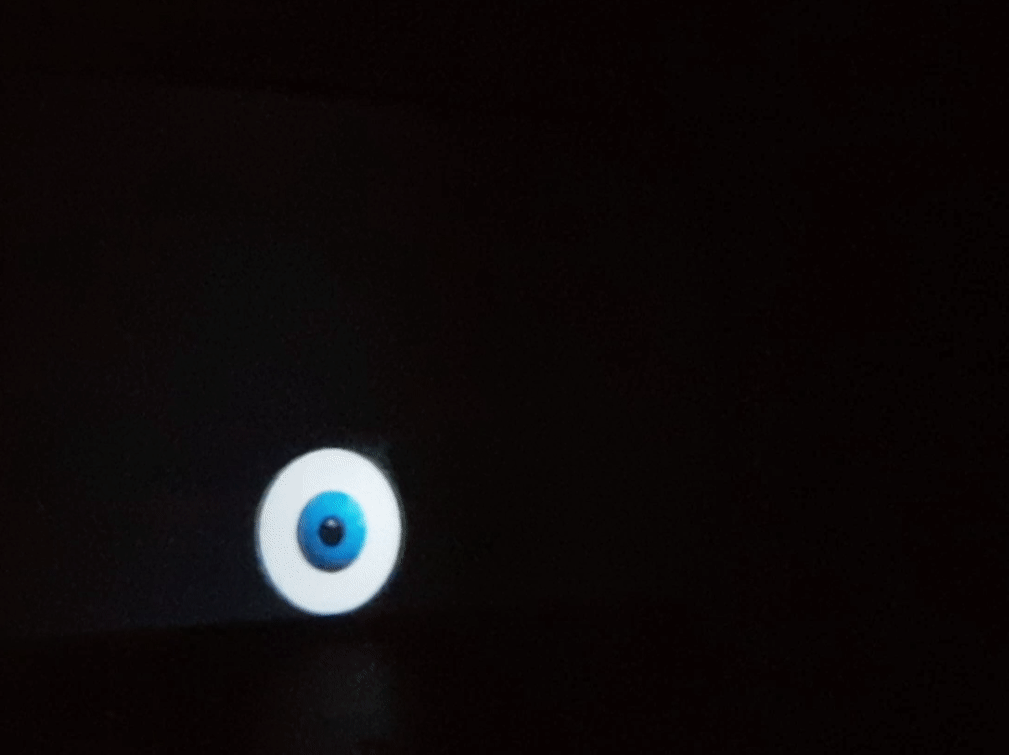
The video here comes from a looping powerpoint presentation with an eyeball image with custom motion paths, it let me create a looping, roaming eye in about 10 minutes. I projected it onto my closed blind, and the effect from outside was quite good:

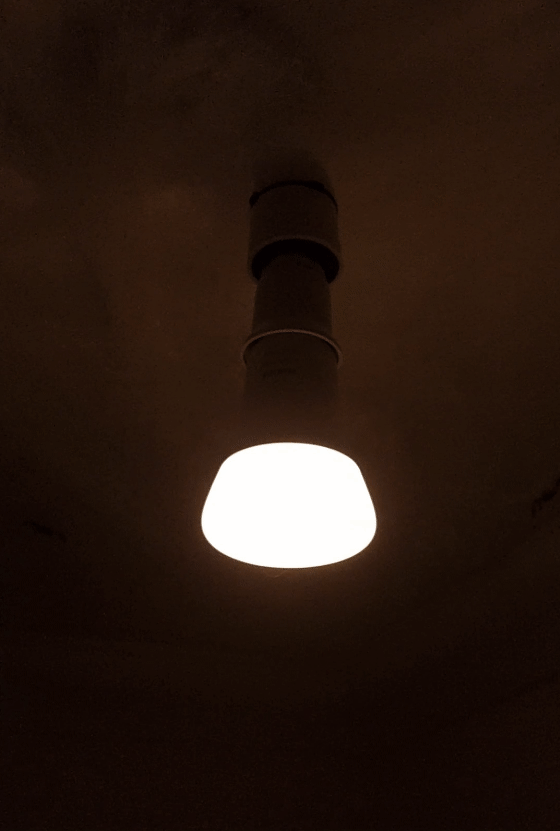
3. Phillips hue effects
I have Phillips hue bulbs throughout my house, three of which are the colour bulbs. It was these that I used to create some cool lighting effects in the hallway and upstairs office. If I had more time to prepare I would have liked to sync the hue lights to audio, but perhaps something for next year. This year I had three effects, all created through a simple bash script that uses the hue hub API.
3.1 Lightning
The first effect was lightning, which was a few API calls in rapid succession:
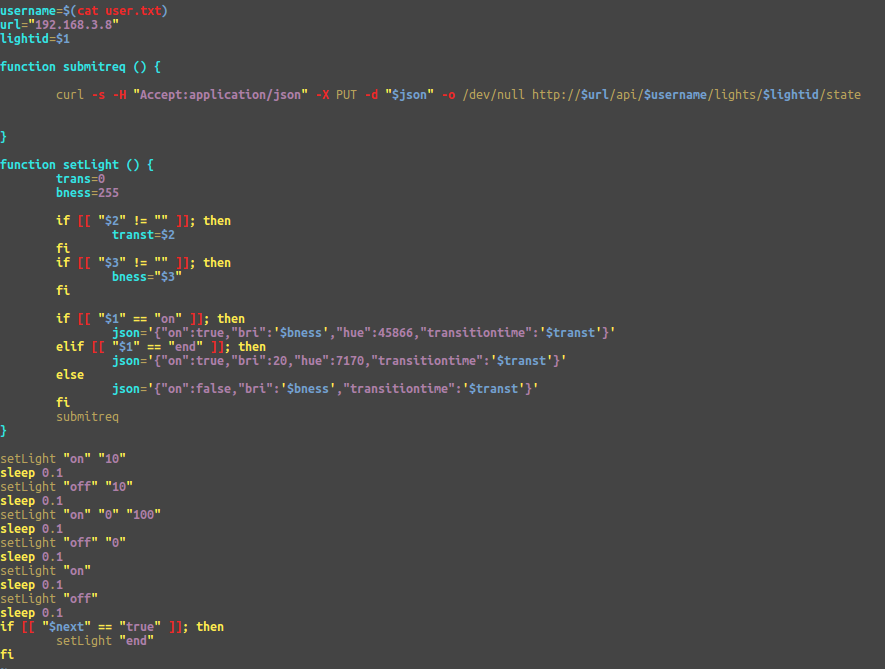
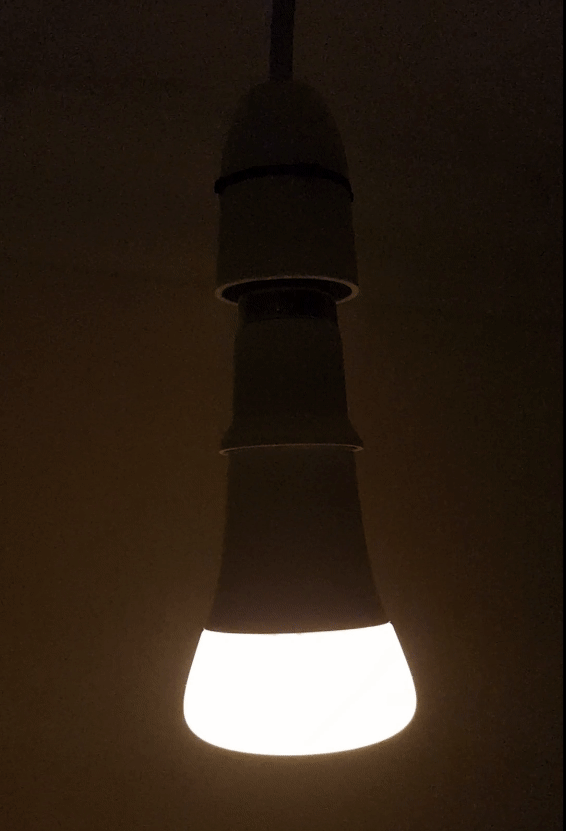
The code here reads in the ‘user’ for the Hue hub (the API token), then tells the hub to turn the light on and off at different intensities with a 0.1 second delay between. The result, which is hard to film, looks something like this:
And from outside the house:

I also wanted some less aggressive lighting effects to be looping on the downstairs lights, so I came up with two much simpler ones, dim and flicker.
3.2 Dim
The dim effect works exactly as you’d expect, it just dims the bulb for a moment then brings it back up, similar to what you might see during a voltage dip or brownout.
The code for all three effects is very similar, with the important difference in the JSON sent to the hue hub.
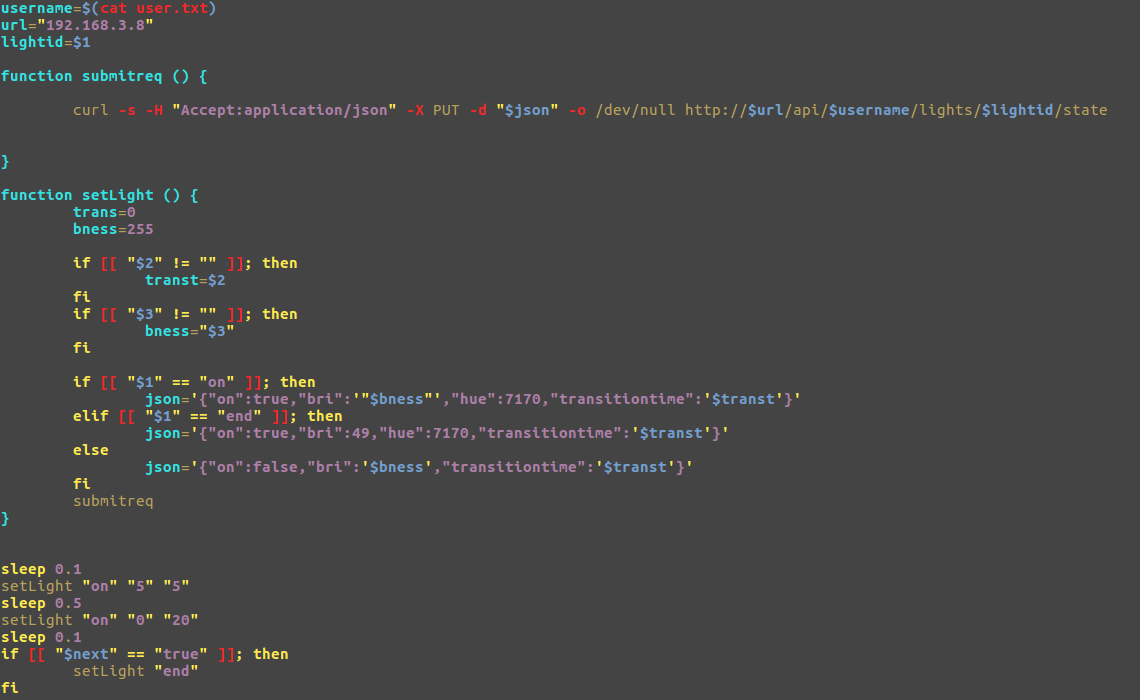
Here it reduces the brightness of the light to 5 (out of 255) with a transition time of 5ms, waits 0.5 seconds, then brings the light back up to 20 immediately.

3.3 Flicker
The flicker effect isn’t dissimilar to the dim effect, it provided another less in-your-face layer of ambience.
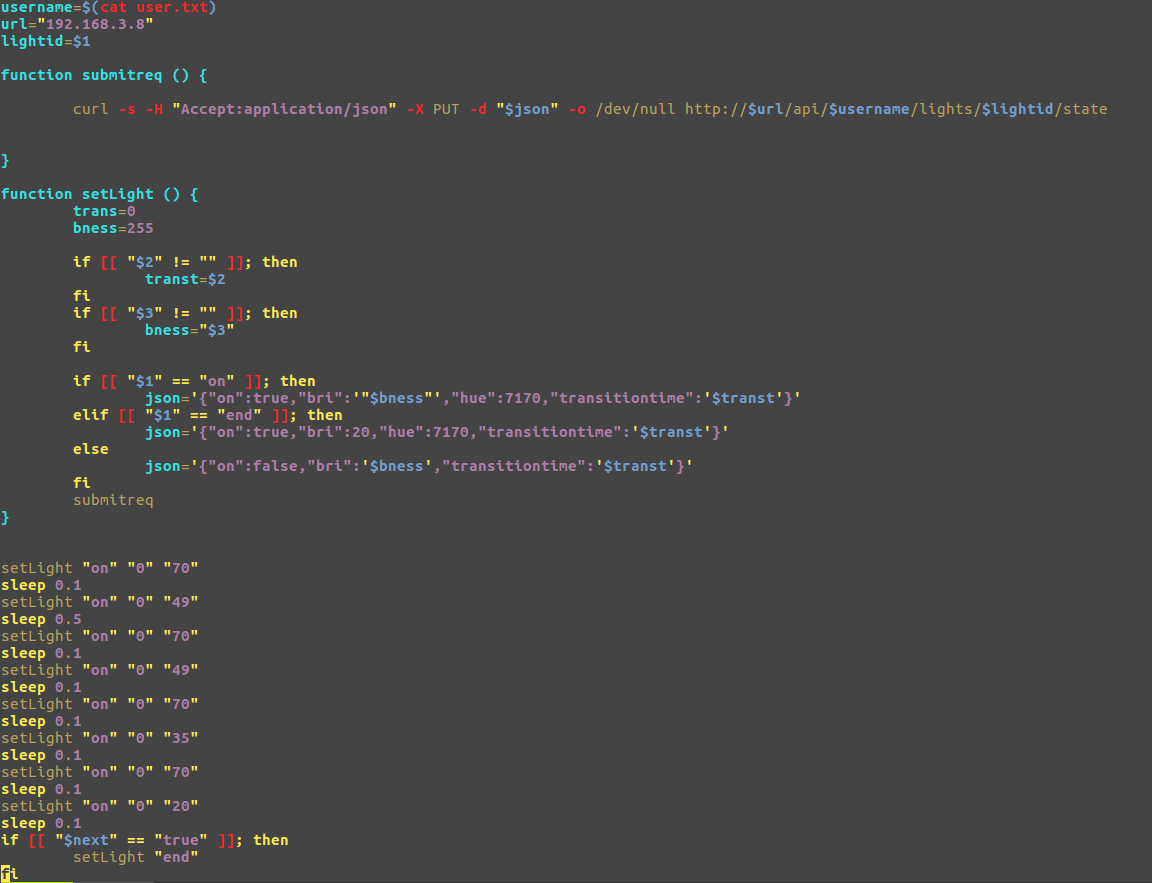
As you can see from the code there are a few more step and lighting levels, with no delay between levels. The effect is quite good.
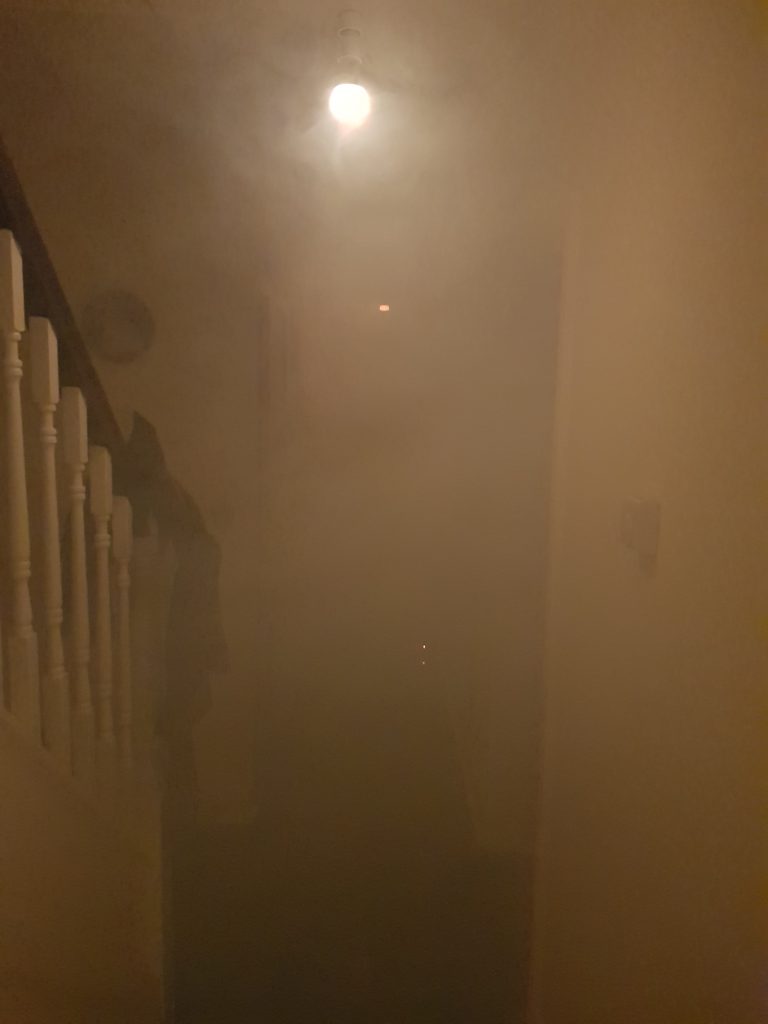
4. The spooky secret weapon – A fog machine
Another last-minute addition – I bought a fog machine (specifically, this one) from amazon to add an extra layer of spookiness to the house. Whilst a little less homebrew than the other items in this list, it definitely deserves a mention as it made the lighting effects that much more pronounced and the atmosphere much more sinister.
Wrapping up
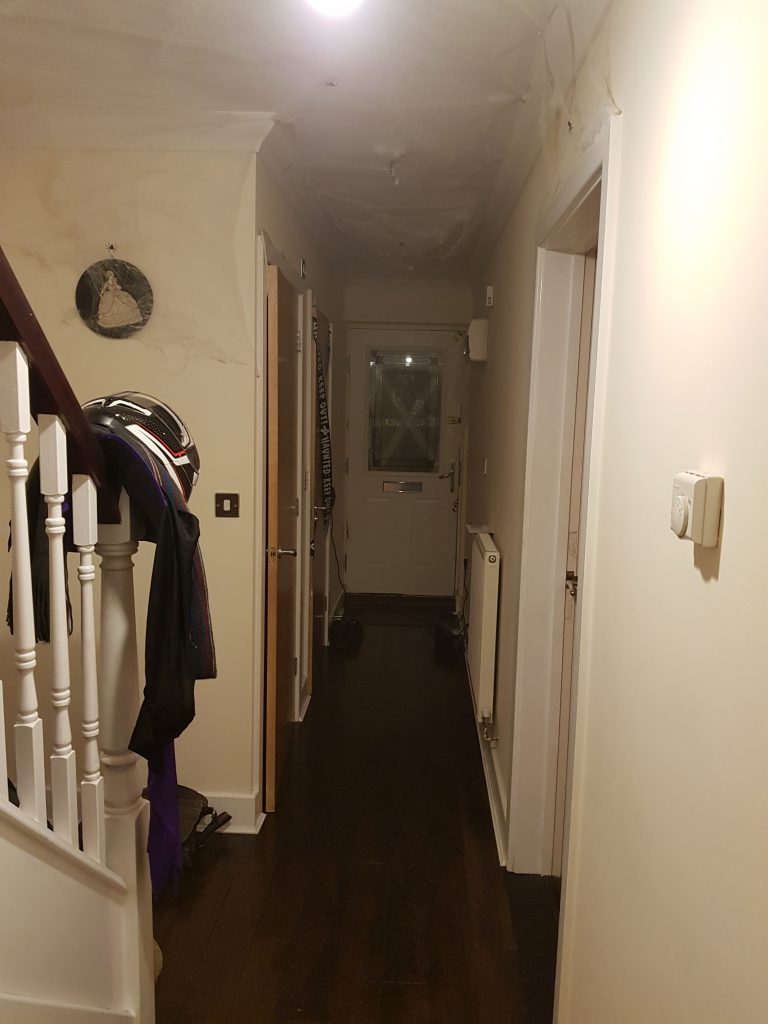
Overall, the effects came together to add an eerier mood to the evening. The hue effects were particularly cool, and I wrote a script to tie all 3 lightning effects together, and at random intervals pair a random effect to a random light (with the exception of the upstairs light, which only did lightning).
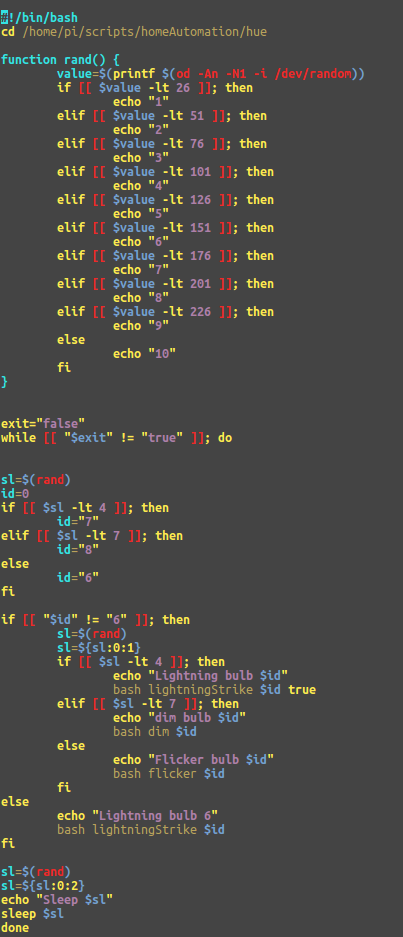
I used the ‘od -An -N1 -i /dev/random’ method of generating random numbers over BASH’s $RANDOM variable, as $RANDOM seemed to produce a certain pattern over time, but for the most part the above script is fairly self explanatory, it picks a random light, then if it isn’t light ID 6 (the upstairs light), performs a random light effect. If it is the upstairs light, it performs the lightning effect, which looked great from outdoors. The lightning looked particularly good from outside through the front door, so perhaps next year I’ll wire up a doorbell to affect the effects.
It was a good start and I hope next year I can take it even more overboard…